A knife is every chef’s weapon. Learning to utilize and work with knives will require patience and time for practice, be it the common fruit-peeling knives or the extra-shiny blades to chop onions along with tears running down your heated eyes. A Japanese knife may be fancier than the common knives used in kitchens as its unique features enable users to slice their desired objects into slim, thin slices or into varying shapes and sizes.
However, without a proper know-how or a guide through the usage of a Japanese knife, you may sooner or later realize that the fullest potential of this all-in-one knife cannot be fully explored and will lead to inefficiency. To pull out the potential a Japanese knife has to chop, slice, and cut all the fine quality ingredients needed to make your all-time favorite sashimi, let’s dive into the guidelines upon how to use a Japanese sushi knife, for beginners and novices alike.
Before we run our fingers through the sharp, slim blade and get ourselves injured along the process, let’s first pick up the shiny blade buddy and take a look at it fiercely.
By that I mean, concentrate. If you think you would hold a knife like how you hold a ballpoint pen, then that is definitely not how it should be practiced. First, it is highly essential to find equilibrium, a balancing point of the knife itself. Try holding the center of the knife with your index finger and your thumb controlling it. Similar to pinching your own skin, use that hand gesture to hold the center of the knife, near to the handle and right below the knife’s spine. Until you find the part of the knife where it doesn’t move or tilt towards the ground, then that is how you locate your knife’s balancing point or center point. When you have located the point where your knife stays balanced, then you can move on to the next step. Rather than gripping or holding the knife’s handle tightly while chopping or slicing, it is best to locate your finger or thumb on either side of the blade as it provides you more control upon which direction the knife is going and where its edge is heading towards during cutting or chopping motions. Furthermore, this knife-holding position also keeps your knife being at a right angle to the chopping board without moving or wiggling.
To make sashimi, it might be a little challenging for beginners who’d still need to learn how to properly hold a knife.
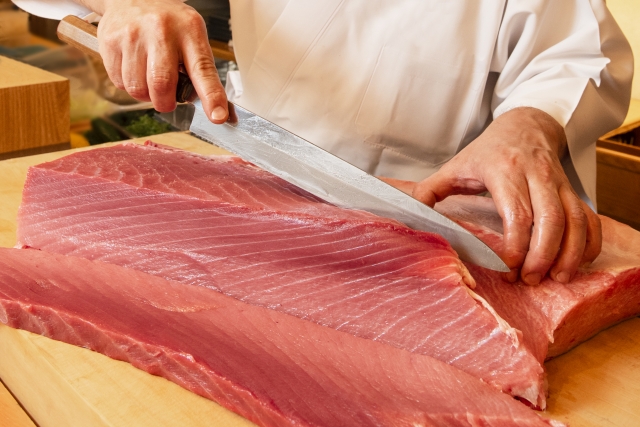
For novices or somewhat skilled users, the finger-spine technique will be essential to slice the famed fatty tuna into thin, perfect slices. However, if you are to first try out the knife to cut other ingredients like fruits and veggies, hands and fingers are recommended to be off the knife’s spine.
The best way to hold or grip your ingredients is to not hold it like when you’re enjoying a steam bun, but to curl your fingertips and grip the object, pressing it down onto the cutting board as if you’re curling your fingers like how a cat hides its sharp claws. Then, make sure your middle finger’s knuckle is touching the face of your knife as it acts as a guide to lead the motions. Other fingers, including the thumb will be behind the middle knuckle, as they will help maintain balance and keep the grip tight. Slowly insert force as you gradually press the knife down onto the object or the ingredient on the cutting board. Once you have practiced this hand-positioning, you would be able to gradually improve your chopping, cutting, and slicing skills for a variety of ingredients, and learn to make sashimi through the finger-spine technique in no time.